How to deploy dotnet core web application in the virtual machine using Azure DevOps

How to deploy dotnet core web application in the virtual machine using Azure DevOps
Overview
- Adding (Windows/Linux) virtual Machines into Azure DevOps
- Setup build pipeline for dotnet core using Azure Repos
- Setup multiple release environment like Development, Testing and Production
- Change environment variables like database connection and other to the respective environment
Adding (Windows/Linux) virtual Machines into Azure DevOps
- Click on pipeline -> deployment groups -> New
- Create Deployment group as follow

- After creating deployment you can see environment specification as below, choose Linux / Windows based on your requirement and copy and execute powershell or bash script on you virtual machine

At this point your virtual machine will be added to your DevOps project.
You can add multiple instance to each deployment group for parallel deployment, For example your production environment is balanced with 10 windows server nodes, you can add 10 nodes into single deployment group. Make sure your source code is published into any branch of Azure Repos, here I am using master branch.
Setup build pipeline for dotnet core using Azure Repos
- Click on pipeline -> Pipeline
- Create new pipeline
- Two ways can be used to setup CI or Build pipeline, One is YAML configuration and Another one is Manual configuration, here I am using YAML configuration
- Choose Classic editor for manual configuration

- And choose repository and branch information

- Choose template ASP.NET CORE

- you will get following screen

- Each template is consisting of group of tasks for building your project, you can edit / delete depend upon your needs, every task has to configure separately based on project solution structure
- Make sure publish task is output folder is referred to build. artficatstagingdirectory

- To enable CI, click on trigger option enable continuous integration, this will trigger build when code is pushed
Setup multiple release environment like Development, Testing and Production
- Click on release -> create new release pipeline and choose empty job
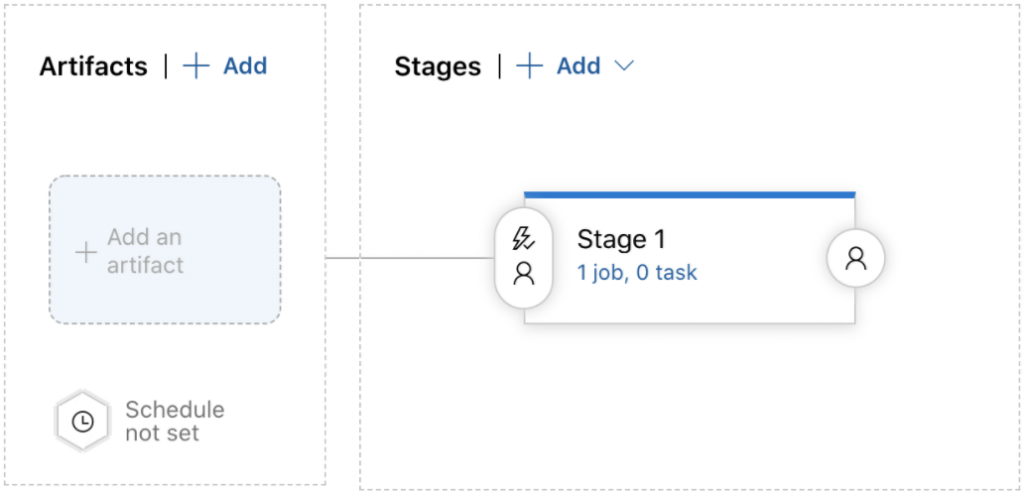
- Click Add Artifacts
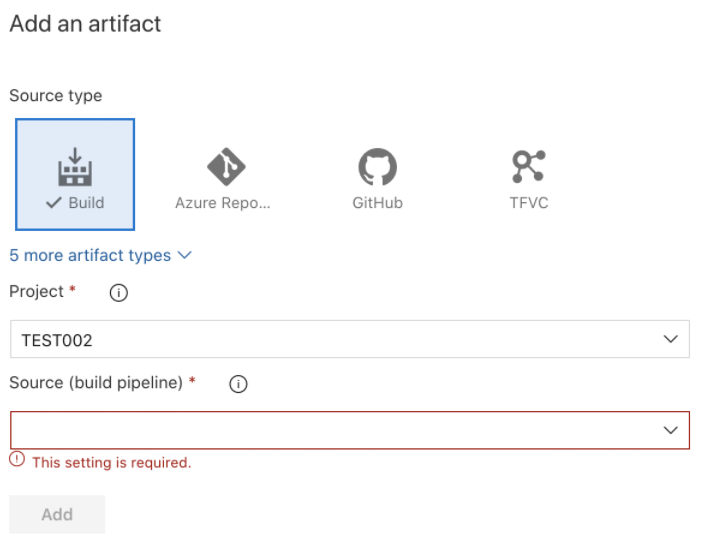
- Select source build from the dropdown list
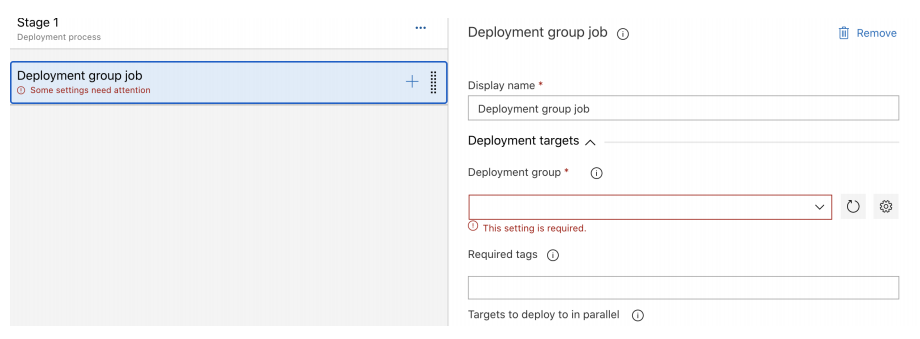
- Edit stages and add deployment job, choose your deployment group
- Add file transform task and choose the file you want replace variable
- Repeat the deployment job for the other environment
- Click on the variable option and add the variables you want to replace
For Example your appsetting.json
” ConnectionStrings”: {
“appConnection”: “your connection”
},
Your variable replace should be
| Name | Value | Scope |
| ConnectionStrings. appConnection | Your replace values | Choose your environment |